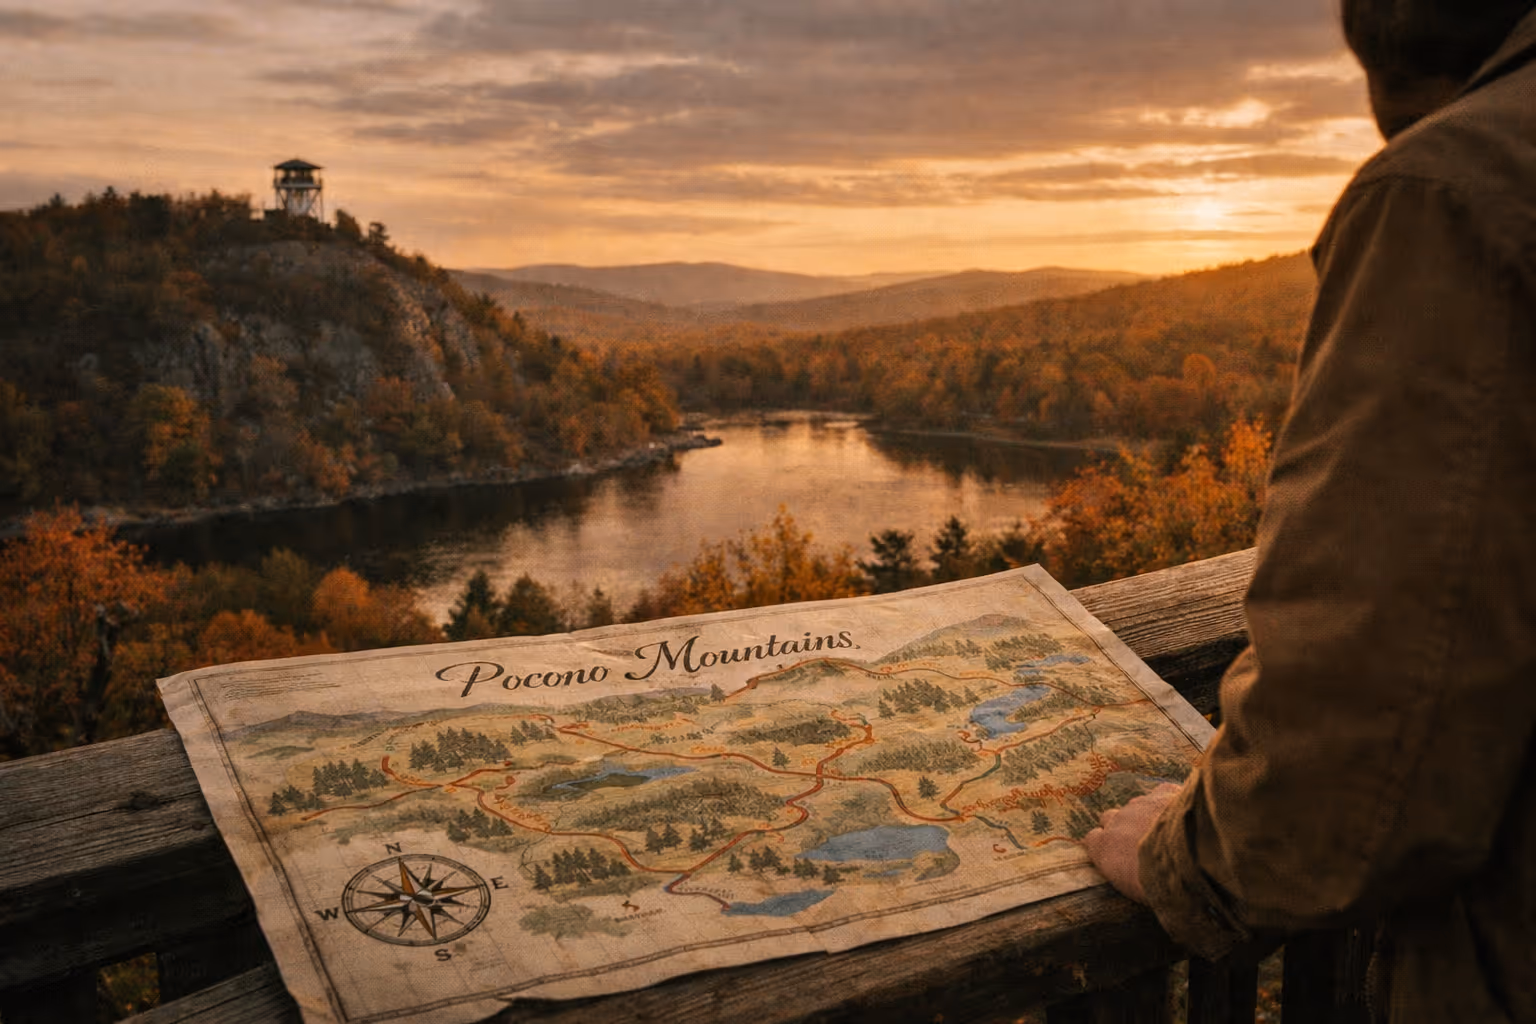
My Impressions of the Zion Subway Trail
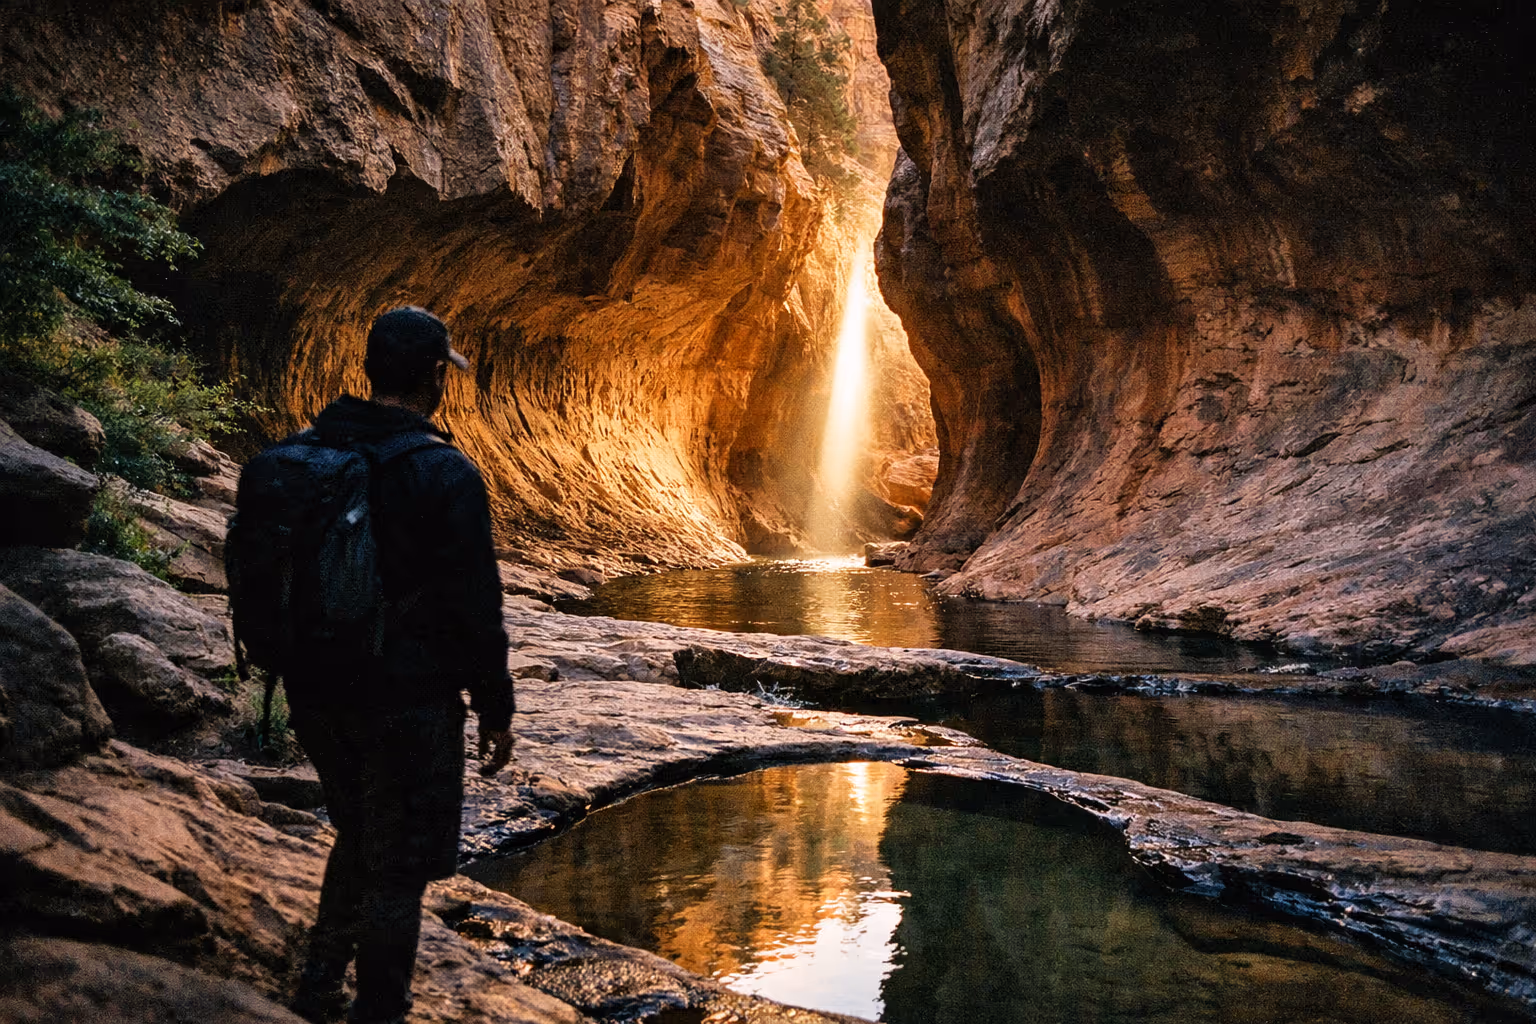
The Zion Subway Trail was worth every step. The end section has some of the most striking scenery I’ve seen on any trail in North America - sculpted sandstone, that cylinder of reflected light, cold green water pooling in the tube. I’m glad I did it, and I’ll do it again.

It’s rewarding partly because of what you’re looking at and partly because you know most people will never get there. If everyone in your group is in decent shape and you prepare ahead of time, you’ll make it. But “prepare ahead of time” means more than packing the right snacks.
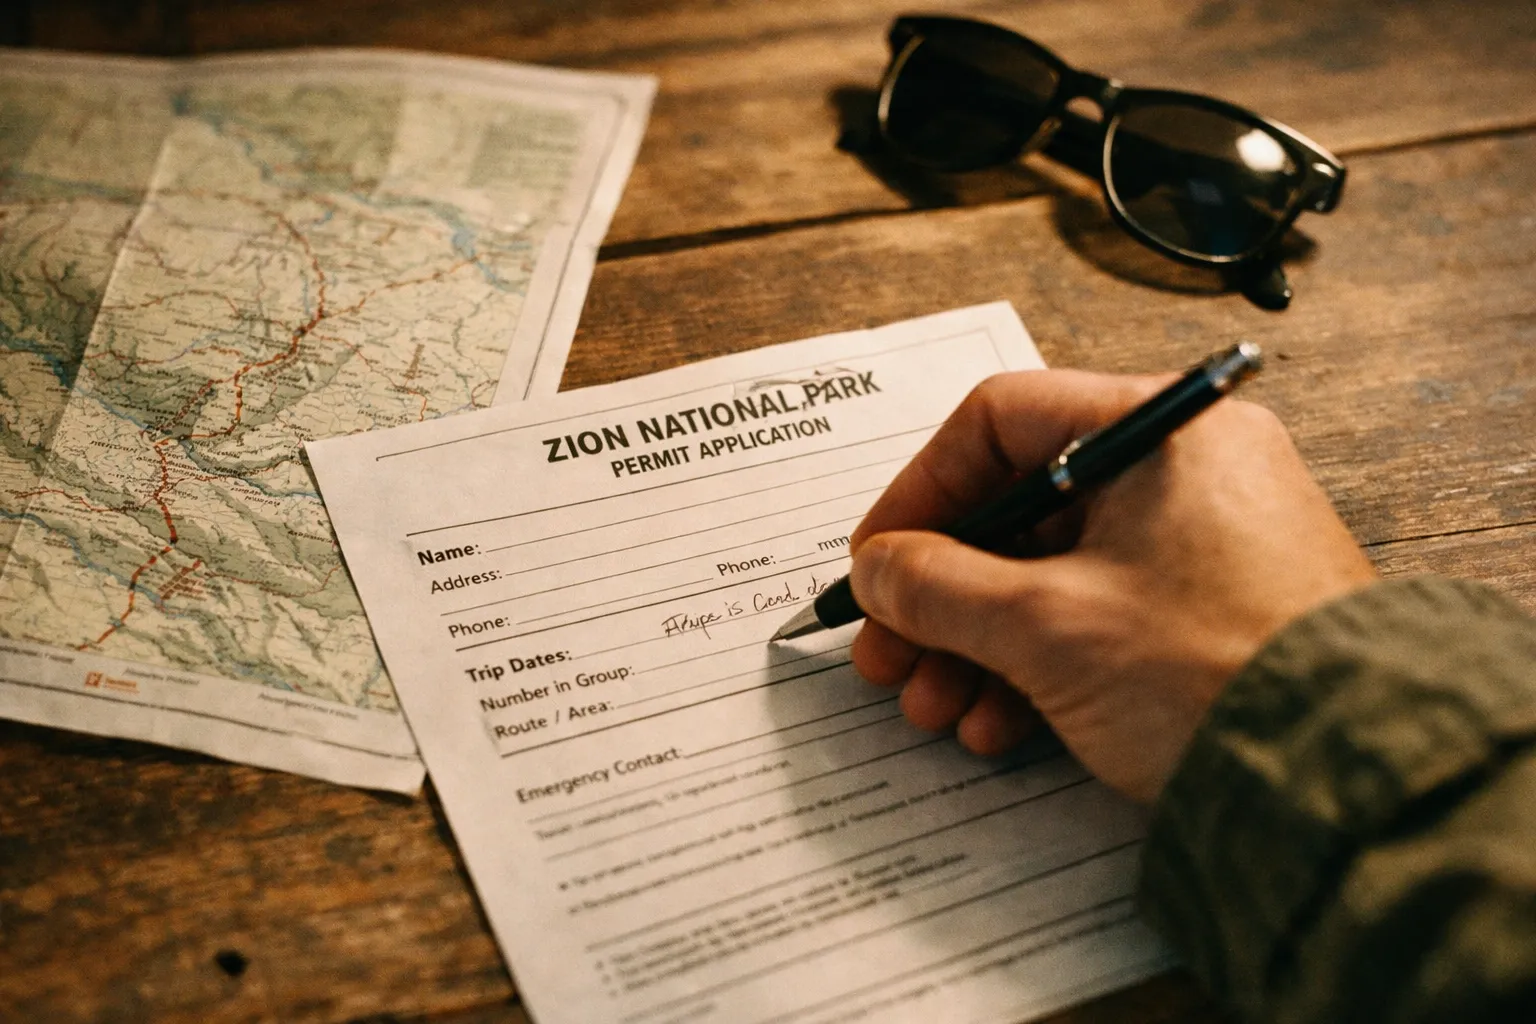
On the permit side: I didn’t get mine in the original lottery. Once I found out I was denied, I started refreshing the Recreation.gov calendar page multiple times a day until a slot opened on a day I was already going to be in the park. After you book online, you still have to pick up a physical permit at the Zion Canyon Visitor Center Wilderness Desk - either the day before or the morning of your hike. Do it the day before. You’ll want to be moving early, and picking up a permit the same morning eats into the time you need.
✓ Pros
- Unique slot canyon scenery with sculpted sandstone and light effects
- Challenging route-finding that keeps you engaged
- Permit system limits crowding compared to other Zion hikes
✗ Cons
- Permit acquisition is complicated and competitive
- Route-finding and bouldering require physical and navigational skills
- Cold water and flash flood risk are real safety concerns
How to Get The Subway Zion Permit
Every person hiking the Left Fork needs a Zion Wilderness Permit year-round, bottom-up or top-down (2)(7). The park caps daily use at 50 people per day (unconfirmed - NPS has not published a current official figure; 50 is the number cited in older permit documentation), with the majority of those permits issued through the Seasonal Lottery and the rest spread across calendar reservations, the daily lottery, and walk-ins (7). There are three ways to land the Subway Zion permit:
1. Seasonal Lottery. Your best option if you’re planning months out. Applications open on Recreation.gov up to four months before your trip date (7). You can list up to four date choices and submit only one application per canyon per season. Win the lottery and you have roughly two weeks to claim and pay for the reservation on Recreation.gov - miss that window and it’s automatically released back into inventory. That’s the single most common way people lose a permit they technically won (7). Fees run $10 for 1-2 people, $15 for 3-7, and $20 for 8-12 per day, charged when you claim, not when you apply (8). (Verify current fees at Recreation.gov before applying - these have changed in recent years.)
2. Daily Lottery (2 days in advance). For dates already locked up by the seasonal lottery or calendar reservations, the park runs a daily lottery. Apply online two days before your intended hike, between 12:00 am and 3:00 pm Mountain Time, and results come back that same afternoon (2)(7). So for a Saturday hike, you apply Thursday before 3:00 pm MT, then pick up your permit Friday or early Saturday morning.
3. Walk-in. If you’re already in the area and your schedule is flexible, show up at the Wilderness Desk right at opening and ask about unclaimed reservations or cancellations. It’s hit-or-miss, but it happens - more often midweek than on weekends.
One timing trick worth knowing: unclaimed seasonal lottery reservations get released to general inventory on the 15th of the month following the lottery, at 10:00 am MT (7). Being logged into Recreation.gov at that exact moment is how I eventually got mine.
Wilderness permits are non-transferable. You can’t sell, gift, or swap your permit, and the trip leader’s name must match the reservation (2). Don’t buy a “spare” off a forum - it won’t hold up when a ranger checks. Set up your Recreation.gov account in advance with payment info and group details already saved. When a slot pops up, that prep can cut your booking time to under a minute, and that matters when you’re competing with other people refreshing the same page.
Park entry is separate from the permit: $35 per private vehicle for 7 days, $20 per person on foot or bike, or the America the Beautiful annual pass at $80.
Subway Hike Zion Bottom Up vs Top-Down
There are two completely different ways to reach the Subway formation, and picking the wrong one for your skill level is a serious mistake.
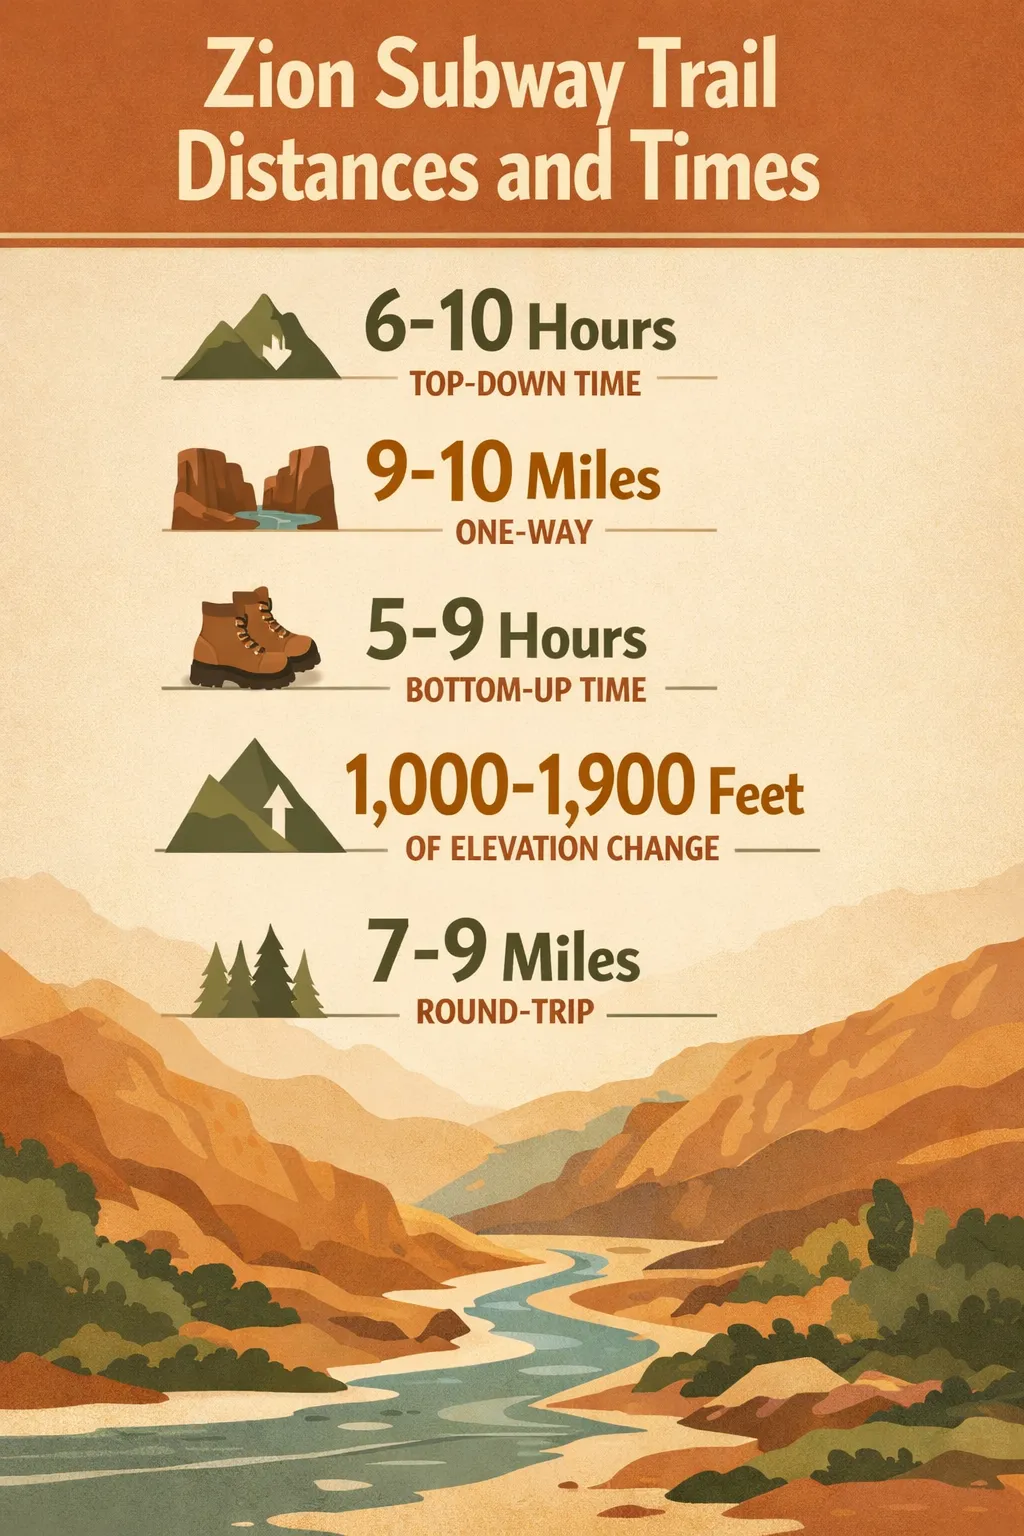 Bottom-up: it’s roughly 7-9 miles round-trip and 5-9 hours; Top-down: 9-10 miles one-way and 6-10 hours.

Bottom-up (non-technical): This is the route I did, and what most hikers mean when they say “the Subway.” It’s roughly 7-9 miles round-trip with about 1,000-1,900 feet of elevation change, out and back from the Left Fork trailhead off Kolob Terrace Road (7)(9). No ropes, no rappels - but plenty of off-trail creek walking, boulder scrambling, and route-finding. The park rates it strenuous. Fit hikers finish in 5-9 hours.
Top-down (technical canyoneering): The Subway hike Zion top-down route runs about 9-10 miles one-way, starting at the Wildcat Canyon Trailhead and finishing at the Left Fork trailhead, so you need a car shuttle. It involves multiple down-climbs and rappels, swimming through cold pools, and serious navigation. Plan on 6-10 hours for an experienced party. This is real canyoneering - you need rope skills, anchor evaluation, and self-rescue ability. If you don’t have those, go with a guide. Guided top-down trips through Springdale outfitters typically run $200-$350 per person including gear.
Both routes pull from the same permit quota. If you can’t rappel safely, the bottom-up is your route, full stop.
What Should I Bring?
Most of the gear list for this hike is what you’d expect for any day hike over 8 miles. Pack 3-4 liters of water per person - the Left Fork creek water is not safe to drink without treatment; bring a Sawyer Squeeze or similar filter if you want a backup source, since there are no developed water sources on the route. Download the AllTrails map offline before you leave cell service, plan to get wet, and wear sturdy hiking boots with ankle support. Poles are more useful than most people expect - I’d go with Black Diamond Trail Ergo Cork poles specifically because the cork grip stays comfortable when your hands are wet from creek crossings, and the rubber tips give you purchase on slick sandstone where trekking baskets would skid.
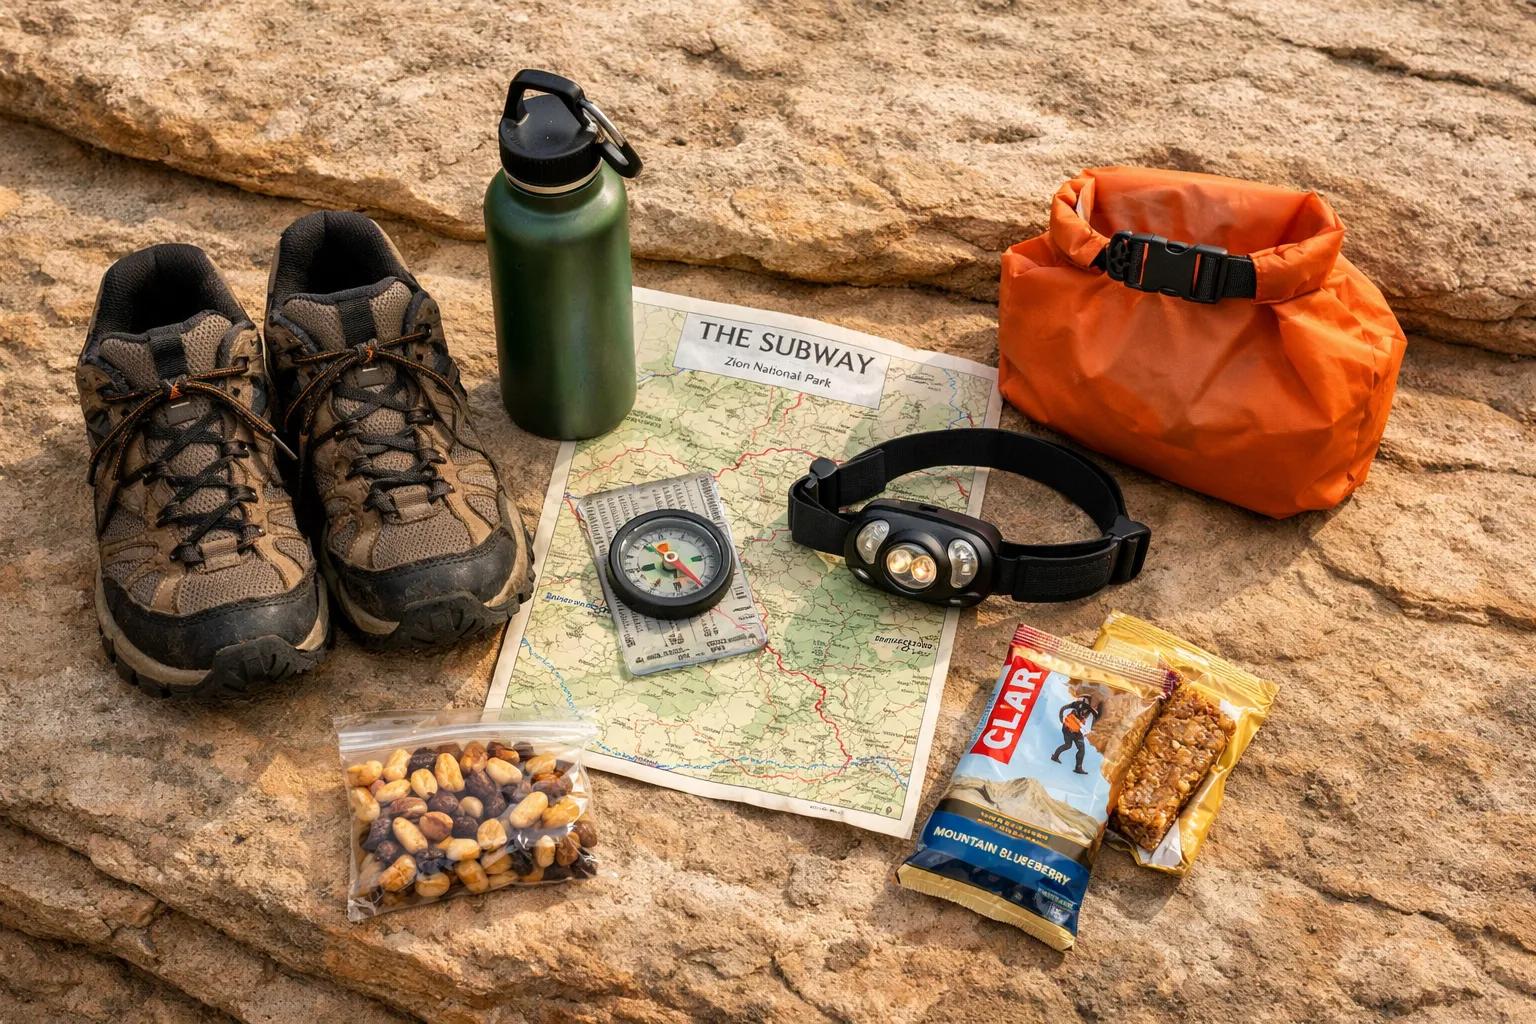
We probably packed too much water and added unnecessary weight to our packs, but I’d rather carry the extra liter than run short in a canyon with no easy exit. We brought the usual Clif Bars, PB&J, crackers, and mixed nuts - plenty, since we ate a big breakfast before reaching the trailhead.
I don’t carry a GPS unit, so the AllTrails map was my backup when things got uncertain. It worked fine for most of the route. My mid-height waterproof hiking boots gave me enough ankle support, but once they were fully submerged - which happened early - the waterproofing was irrelevant. Accept that your feet will be wet and the hike gets a lot less stressful.
We skipped the poles after reading that they’d be more trouble than they’re worth on the rocky sections and in the water. I still think that’s mostly true. But on the way out, tired and scrambling back up over boulders, I wanted them.
One thing I’d add to the standard list: if you’re hiking in spring runoff or cooler months, the water stays cold - often below 60°F even when the air is over 80°F. NRS 2mm neoprene socks are worth the hassle; they prevent the foot numbness that starts setting in after the third or fourth crossing and reduces blistering from wet boot friction on the long scramble out. Springdale outfitters rent canyoneering boots and neoprene socks for around $25-$40 a day if you don’t want to buy. Pack a dry bag for your phone and camera too. You will go in deeper than you expect at some point - not maybe, definitely.
For footwear, I’ve since switched to the Altra Lone Peak 7 for wet canyon hikes. The wide toe box and drainage ports handle creek crossings better than traditional waterproof boots once you’re past the point of keeping your feet dry anyway.
What About the Route Finding?
The issue wasn’t being unprepared with gear. It was the actual difficulty of certain sections of the trail. I read probably 20 articles and blog posts about route-finding before I went, and none of them fully conveyed what it’s like when you’re standing in front of a 10-foot boulder field with wet boots and a heavy pack.
That said, the route-finding itself was genuinely fun for most of the hike out. When you think you’re stuck and the only option is knee-deep water, there’s usually a line on the other side of the creek. Early on, we made a decision to stay on one side as long as possible to minimize crossings. It worked well on the way in. Less so on the way back.
Before you pick up your permit, the ranger will warn you about “false trails” - areas that look like established paths but pull you away from the creek and up into terrain you don’t want to be in. We hit one of those. We climbed too high, realized it, and had to make a sketchy slide back down toward the water. The rule is simple: when in doubt, stay with the creek.
The exit is where people lose time. I remember thinking on the way in, “I don’t understand how anyone misses the exit - there are cairns everywhere.” I take that back. Once you’re tired and moving slower, the landmarks you noted on the way in don’t register the same way. I’d marked a large white rock near the creek as a reference point for the exit. When we were close, I still couldn’t find it immediately.
My advice: check your map more frequently as you approach the exit, stay on the right side of the creek, and follow footprints. The trailhead sign will eventually appear. The Zion Subway trail map on AllTrails is useful as a sanity check - it’ll confirm you’re next to the creek and moving in the right direction - but it won’t tell you which side to walk on or where to cross. Download it offline before you go, and when you pick up your permit, ask the Wilderness Desk staff to mark up a paper map with current conditions: log jams, water depth, algae patches. For detailed GPS waypoints and mile-by-mile beta, Joe’s Guide to Zion (joesguidetozion.com) and Tom’s Utah Canyoneering Guide (canyoneeringusa.com) are more useful than any single blog post - both maintain current route notes and are the sources I cross-referenced before my June 2024 trip.
You can’t just walk upstream in certain areas - massive boulders block the way entirely. The same goes for clearings on either side of the creek. We backtracked a few times to find a crossing because the only passable line was on the opposite bank. It wasn’t hard exactly, but it added real time to an already long day.
Is There Bouldering?
This was my biggest frustration with the research I did beforehand. Every article mentioned “some bouldering” or “a rocky trail.” None of them prepared me for what’s actually down there.
On multiple occasions, the only option was to climb over boulders 6 to 10 feet tall. Your boots will be wet and muddy by that point, which makes it harder than it sounds. It requires upper body strength and more flexibility than you’d want after four hours of hiking. Add a loaded pack and camera gear and it becomes a genuine workout.
Stretch before you start. At the trailhead, before you leave the parking lot. A pulled muscle halfway through this canyon is not a situation you want to manage.
The bouldering reminded me of Old Rag in Shenandoah - my first real encounter with that kind of obstacle on a trail. Looking back, there were probably moments where we could have avoided a big climb if we’d been on the other side of the creek or more willing to wade through deeper water. It comes down to a constant cost-benefit: backtrack and cross, or keep moving and climb? There’s no universally right answer.
Zion Subway vs Narrows
People ask about Zion Subway vs Narrows constantly, usually because both are permit-adjacent, water-heavy hikes and the names blur together in trip-planning research. They’re not the same hike. They’re not even in the same drainage.
The Narrows is the main Virgin River gorge in Zion Canyon. The Subway is the Left Fork of North Creek - a separate canyon off Kolob Terrace Road with its own permit system. Here’s how they compare:
Zion Subway vs Narrows vs Angels Landing
| The Subway (Bottom-Up) | The Narrows (Bottom-Up) | Angels Landing | |
|---|---|---|---|
| Distance | 7-9 mi round-trip | Up to about 9.4 mi round-trip | about 5 mi round-trip |
| Elevation Gain | about 1,000-1,900 ft | Minimal | about 1,500 ft |
| Typical Time | 5-9 hours | Choose your distance | 4-6 hours |
| Permit Required | Wilderness permit required | None for bottom-up | Lottery permit required |
| Difficulty | Strenuous, off-trail | Moderate, in-river | Strenuous, exposed |
The practical difference is significant. The Narrows bottom-up needs no permit and no route-finding - you walk up the river as far as you want and turn around. The Subway requires a permit, off-trail navigation, and sustained scrambling. For an average hiker, the Subway is the harder day by a clear margin. If you want an introduction to a water hike without the commitment, do the Narrows. If you want the slot-canyon payoff and you’re ready to work for it, the Subway delivers.
Why Do Some Call This Hike Underwhelming or Overrated?
You’ll find posts calling this hike underwhelming right up until the final section. I don’t think that’s a fair read. The hike makes it hard to stop and appreciate what’s around you because you’re constantly tracking your next move - avoiding brush, watching your footing on slick rock, scanning for the best crossing. The scenery is there, but you have to choose to stop and look at it.
There were several spots where I wanted to set up my camera but was either worried about losing daylight or too focused on forward progress. When you do find yourself in a clearing with open canyon walls around you, stop. Take the 360-degree view. If you do that consistently, you won’t find this hike underwhelming.
If you go in expecting a pleasant creek walk that ends at a photogenic formation, you may end up overwhelmed instead. We started the day alongside a few other groups. Some passed us and finished faster. Others never made it to the Subway at all. Social media makes it look easier than it is - the photos don’t show the four hours of scrambling that preceded them. You earn this one.
One note on photography: the classic Subway “glow” - reflected light running down the tunnel - peaks roughly between 11:00 am and 1:00 pm. If that shot is your priority, pace the hike to arrive at the formation in that window.
How Long Am I Going to Be on the Trail?
It depends on your route-finding, your fitness, how many photos you take, and how long you spend at the formation. I went in expecting to finish in 6-7 hours. I’ve done plenty of long day hikes and I’m usually on the faster side.
We were on the trail for 10 hours.
The ranger’s estimate of 6-10 hours seemed like a wide range when I heard it. It made complete sense by the time I got back to the car. We took more breaks than most people probably would - water, snacks, a few minutes to look around - but we knew it was a full-day commitment and didn’t rush. It took about four hours to reach the Subway. We spent an hour there: ate lunch, set up the camera, took a few minutes to just sit in it.
The return trip should have been faster since we weren’t stopping for photos and had already eaten. It wasn’t. Route-finding felt harder on the way out for reasons I still can’t fully explain, and we both picked up minor injuries that slowed us down. Another four hours out.
Ten hours total. I think a fit, efficient party could do it in 7-8. Don’t count on 6 unless you’ve done this specific trail before.
You will not have the Subway to yourself. You’ll share it with people who came down the top-down canyoneering route and others who took the same path you did. We had it to ourselves for about 20 minutes, which felt lucky. If you want the iconic photos without other people in the frame, you’ll need to wait your turn. Factor that into your timing.
A good lunch spot sits about 75 yards before the Subway - dry ground on either side of the creek, open sky, and enough room to spread out. The Subway itself is cold and shaded, so you’ll appreciate sitting in the sun before you go in.
Safety, Flash Floods, and Leave No Trace
The Left Fork is a narrow canyon. Flash-flood risk is real during monsoon season, roughly July through September.
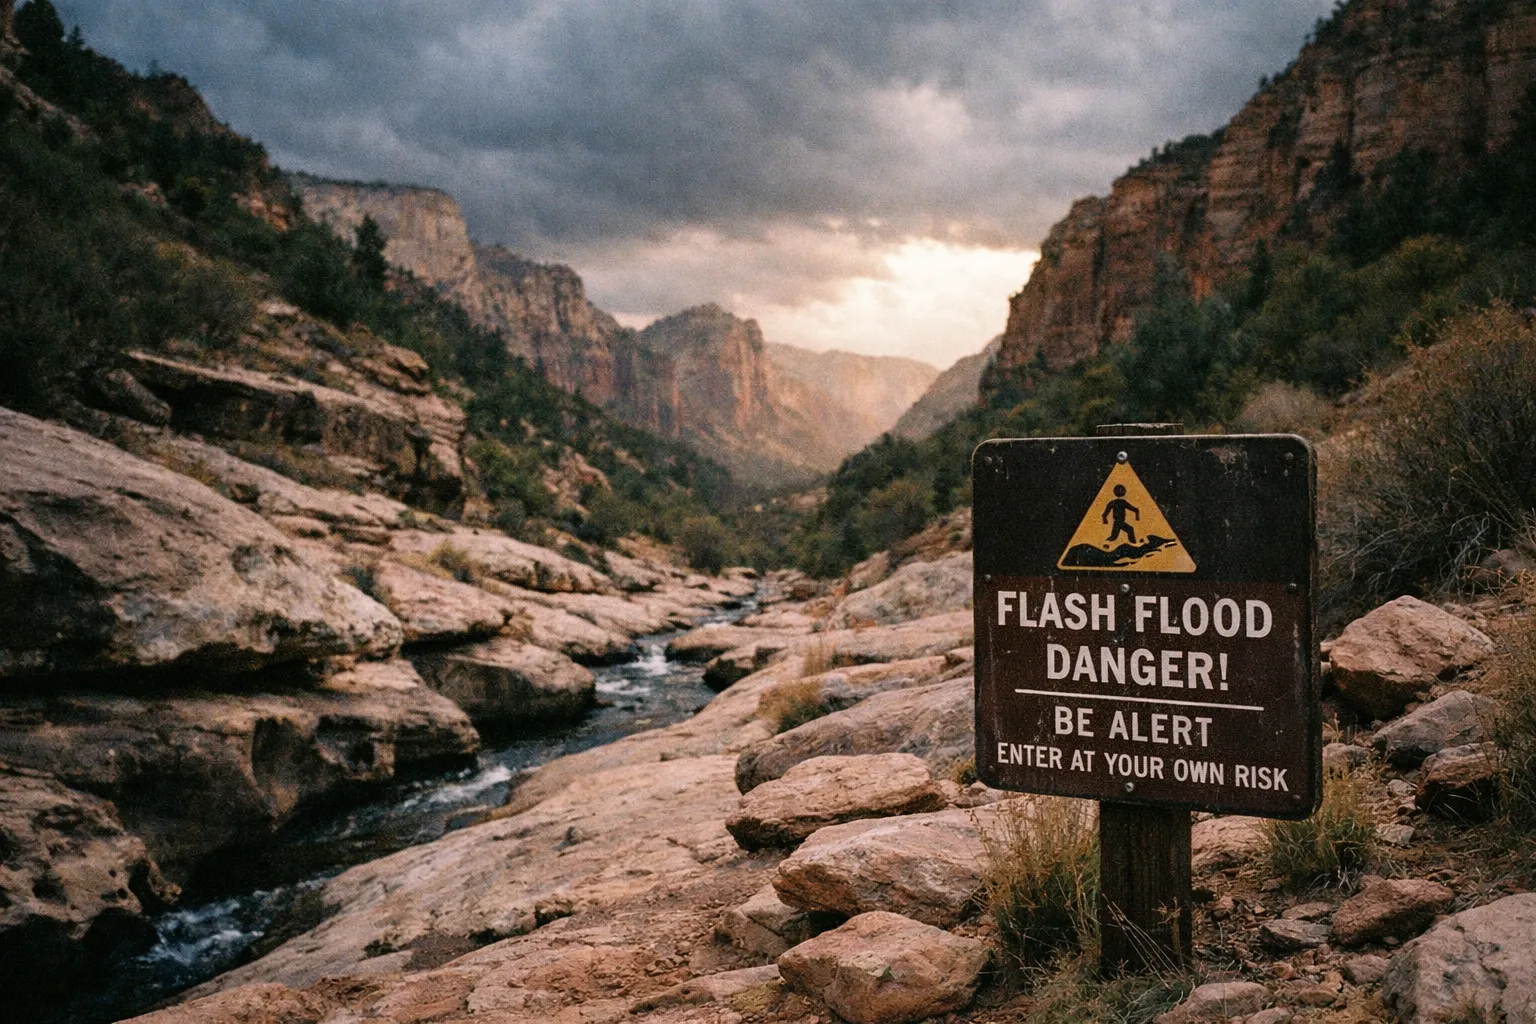
Do not enter with thunderstorms in the forecast or with elevated flow. Rangers may cancel permits or issue strong warnings during these periods. Listen to them.
Cold water is the other hazard that people underestimate. Even on an 80°F day, the creek can sit below 60°F, and a wet party moving slowly through shade can flirt with hypothermia. Layers and a dry change of clothes in a dry bag are not optional in cooler months - they’re safety gear.
A few logistics before you go:
- The Left Fork trailhead is off Kolob Terrace Road, roughly 20-30 minutes from Springdale. It’s outside the Zion Canyon shuttle system - you drive yourself, and you need to display your permit slip on the dashboard so rangers can track who’s in the canyon (4).
- Start early. Picking up your permit the same morning can push your trailhead arrival to 8-9 am, which risks exiting in the dark. Claim the permit the day before and aim to leave the trailhead by 6:00-7:00 am in summer.
- Pack out everything, stay on durable surfaces in clearings, and don’t build new cairns. This is a fragile canyon environment that sees heavy quota-limited traffic.
Frequently Asked Questions
Frequently Asked Questions
- Can I transfer or sell my Zion Subway permit?
- No. Wilderness permits are non-transferable and must match the trip leader's name exactly.
- What happens if I miss claiming my seasonal lottery permit on time?
- The permit is automatically released back into general inventory and you lose your reservation.
- Is it safe to hike The Subway during monsoon season?
- No. Flash flood risk is high July through September; do not enter if thunderstorms or elevated flow are forecast.
- Can I rely solely on GPS for navigation on The Subway trail?
- No. GPS can help, but paper maps with current conditions and frequent checking are essential due to complex route-finding.
- Are hiking poles worth bringing for The Subway hike?
- Yes. Poles help on boulder scrambles and tired legs, especially on the return, despite some rocky and wet sections.
- How do I get a permit if I miss the seasonal lottery?
- Try the daily lottery two days before your hike or show up for walk-in permits at the Wilderness Desk early.
- What footwear works best for wet canyon hiking in The Subway?
- Altra Lone Peak 7 trail runners with drainage ports handle creek crossings better than waterproof boots once wet.
Wrap Up
When you make it back to the parking lot, you’ll likely have covered closer to 11 miles. Creek crossings and route-finding add distance that doesn’t show up cleanly on any map. On the way out, we got off course twice and had to backtrack to find the correct line.
The biggest thing that derails people on the Zion national park Subway trail isn’t the hiking - it’s the permit. Enter the seasonal lottery early, claim your reservation the moment you win, and remember the daily lottery runs two days out, not the day before. Pick up your physical permit the afternoon before your hike, get to the trailhead by 6 or 7 am, and treat the cold water and the flash-flood forecast as non-negotiable factors, not suggestions. If you’re chaining together more Western day hikes on the same trip, the Cascade Pass and Sahale Arm trail rewards the same kind of full-day effort.
Do all of that, and the Zion Subway trail earns its place near the top of your list - without the usual Zion crowds.