The Cascade Pass Sahale Arm trail hands you real alpine terrain for nearly 4,000 feet of climb over 12 miles round trip, with a loose scree scramble up top most people underestimate. Get there early: the lot fills by 8 or 9 on summer weekends, and a tow off Cascade River Road runs into the hundreds. Water goes unreliable above the pass, so leave it carrying at least a liter and a half. Late September is the window I would pick: bugs gone, crowds thin, heather turning.
A Last-Minute Change Leads to Real Alpine Terrain
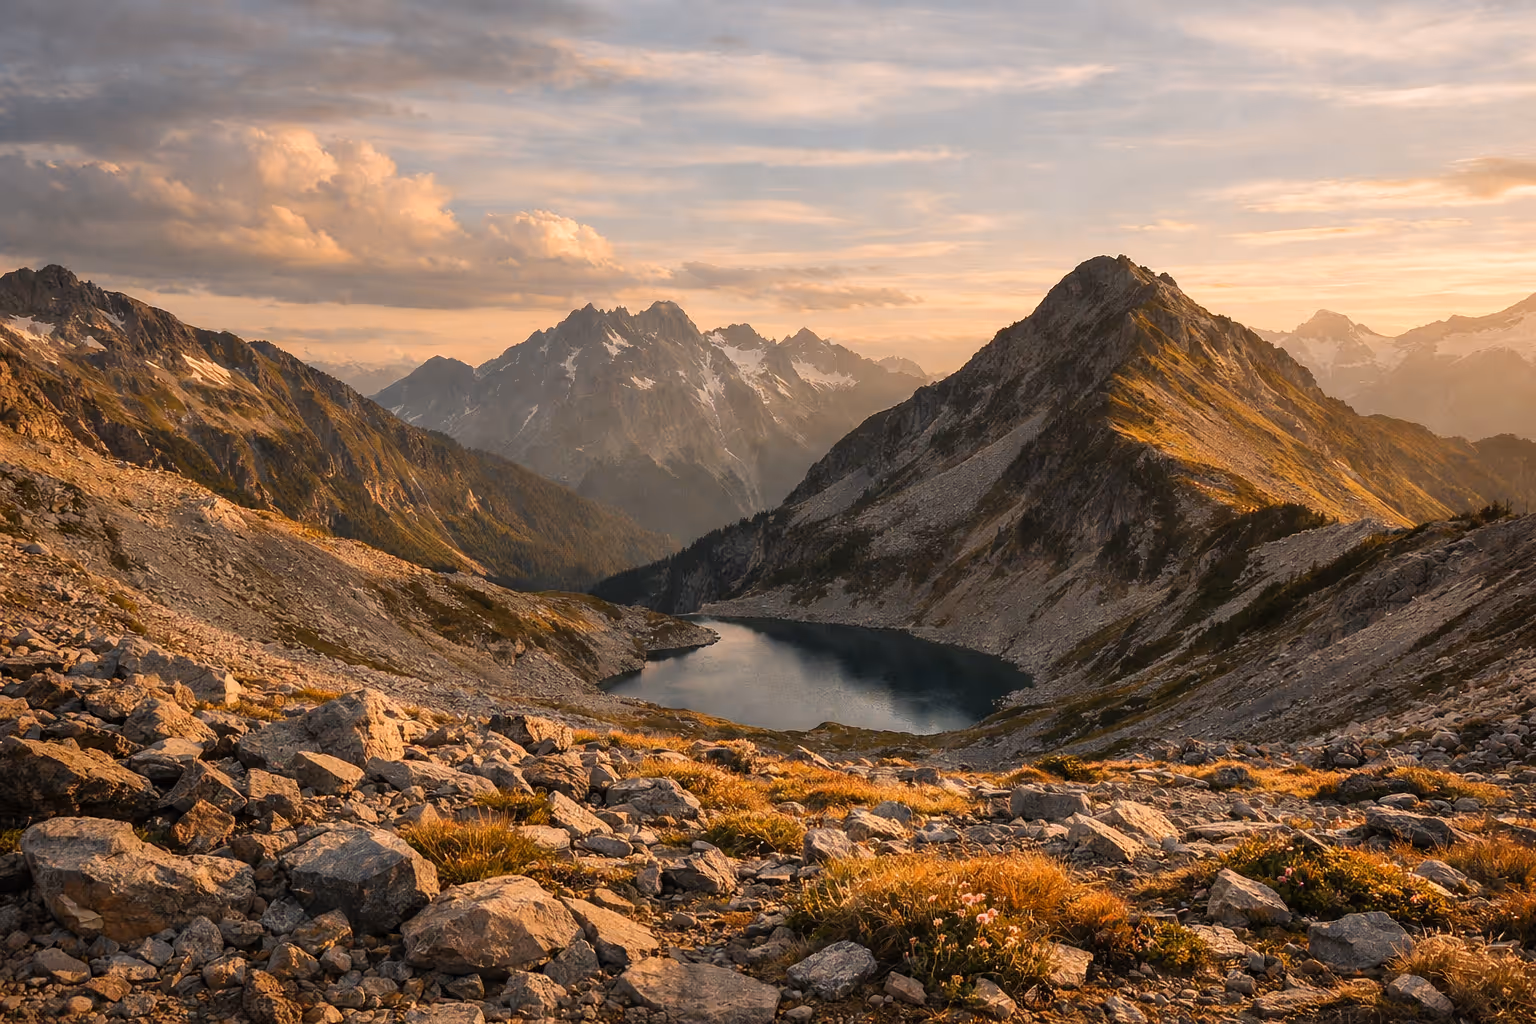
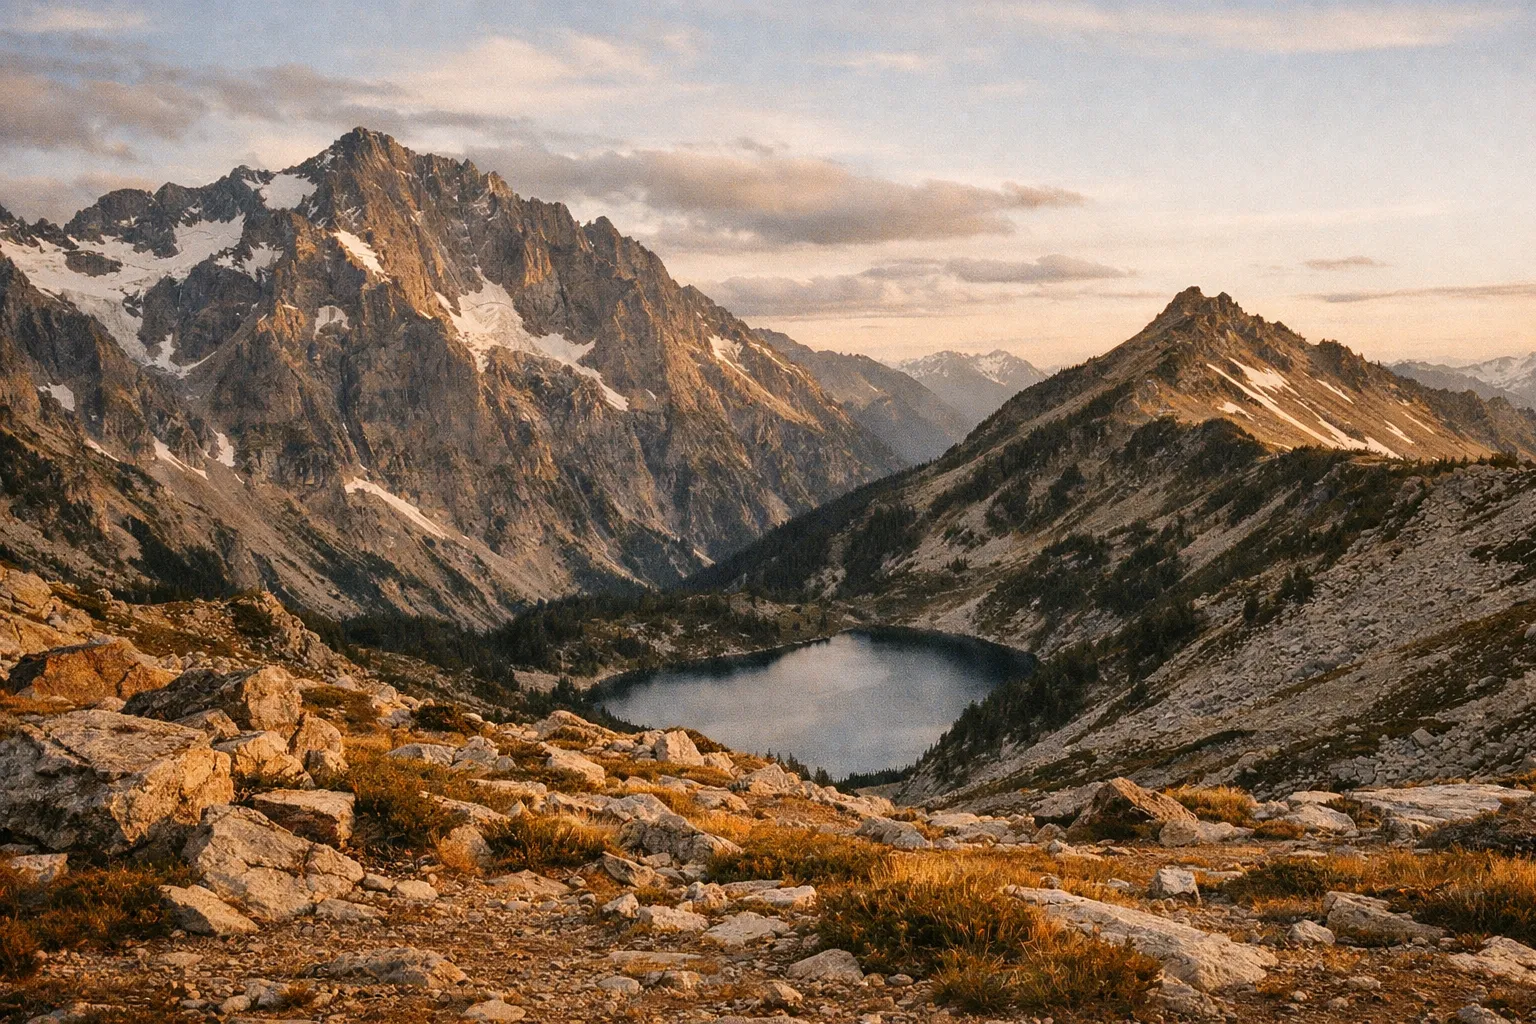
The cascade pass sahale arm trail wasn’t my original plan. I had Hidden Lake Lookout penciled in for my second trip into North Cascades National Park, but late-night research the day before pushed me to swap routes. No regrets. The cascade pass to sahale arm route delivers the kind of high alpine views - Johannesburg Mountain across the valley, Doubtful Lake set into a basin below the ridge, Sahale Glacier hanging above - that justify every foot of the climb.
I hiked this in late summer, going up Sahale Arm partway and dropping down to Doubtful Lake on the return. Roughly 10 miles total, about 6 hours moving time including stops. What follows is the actual trail breakdown: mileage, elevation, road conditions, and the parts that matter when you’re deciding whether to commit to the full sahale arm hike or pick a shorter option.
✓ Pros
- Varied route options to match fitness and timing
- High alpine views including Johannesburg Mountain and Sahale Glacier
- Access to scenic Doubtful Lake without full climb
- No entrance fee for day hiking
✗ Cons
- Steep elevation gain with nearly 4,000 ft on full route
- Upper scramble requires route-finding and exposure comfort
- Limited water sources above Cascade Pass
- Cascade River Road can be rough and subject to closures
Cascade Pass Sahale Arm Trail Stats: Distance and Elevation Gain
The numbers, straight from the NPS Cascade Pass / Sahale Arm trail page (2):
 Cascade Pass Sahale Arm Trail distances and elevations: 3.5 miles to Cascade Pass; 5.9 miles to Sahale Glacier Camp; 12 miles round trip with ~4,000 ft of gain; camp at 7,600 ft; Doubtful Lake at 4,400 ft.
- Cascade Pass Trailhead to Cascade Pass: 3.5 miles one way, 1,700 ft gain
- Trailhead to Sahale Glacier Camp: 5.9 miles one way, 3,940 ft gain
- Trailhead to Cottonwood Camp (Stehekin side): 9.0 miles one way
The total sahale arm elevation gain from the trailhead to the camp overlook is just under 4,000 feet (2). Most day-hikers going all the way to the Sahale Glacier Camp overlook log around 12 miles round trip with that full 4,000 ft of climbing, finishing in 7-9 hours moving time (4, 6).
Cascade Pass itself sits at roughly 5,400 ft. Sahale Glacier Camp tops out near 7,600 ft. Doubtful Lake is below the pass, around 4,400 ft - meaning if you detour there, you give up about 1,000 ft and have to climb it back.
The first 2.5 miles up from the trailhead include about 35 switchbacks gaining 1,500 ft (4). It’s not steep by Cascades standards - averaging around 600 ft per mile - but it’s relentless.
Getting There: Cascade River Road
The cascade pass trailhead sits at the end of Cascade River Road, 23 miles east of Marblemount off SR-20. The first third is paved; the rest is gravel. It’s not the worst forest road in Washington, but it’s rough enough that you should think twice about taking a low-clearance sedan with bald tires.
Plan on 45-60 minutes from Marblemount to the trailhead. Drive it during daylight if you can - the narrow sections with cliff drops are easier to read in good light.
A few things that aren’t obvious until you’re already committed:
- No cell service from roughly Marblemount onward. Download offline maps before you leave town.
- No gas, no water, no food past Marblemount. Fuel up at Concrete or Marblemount before turning onto Cascade River Road.
- Road status changes. Cascade River Road has had washouts and partial closures in recent seasons; if the road is closed before the trailhead, you’re adding 2-6 miles of road walking each way. Check the NPS alerts page within 24 hours of your trip (2).
From Seattle, budget 3.5-4 hours one way. Round trip drive plus a 7-9 hour hike makes for a 14-17 hour door-to-door day. If you can sleep in Marblemount or Rockport the night before, do it.
Parking and the Trailhead
The trailhead has a parking lot, vault toilets, and benches. It also fills up fast. NPS calls Cascade Pass “the most popular day hike in the park” (2), and on summer weekends the lot is often full by 8-9 AM. I rolled in at 8:30 AM and barely got a spot - only because someone was leaving as I pulled in.
If you arrive after 9 AM in July or August, expect to park on the road shoulder and walk the extra distance. Enforcement of no-parking zones has gotten stricter as visitation has climbed, so read signs carefully. Towing from this road can run $400-$800, and the nearest tow service is not close.
Use the toilet here. There are no facilities at Cascade Pass, on Sahale Arm, or at Doubtful Lake.
The Climb to Cascade Pass
The first two miles climb steadily through hemlock and fir forest. The switchbacks are well-graded and easy to settle into a rhythm on. You get teasing views out toward Johannesburg Mountain through the trees, with the noise of distant ice and rockfall off the Johannesburg face - that constant low rumble is one of the signatures of this trail.
Around mile 3, the forest opens into meadow and the grade eases. You’ll hit Cascade Pass proper at 3.5 miles (2).
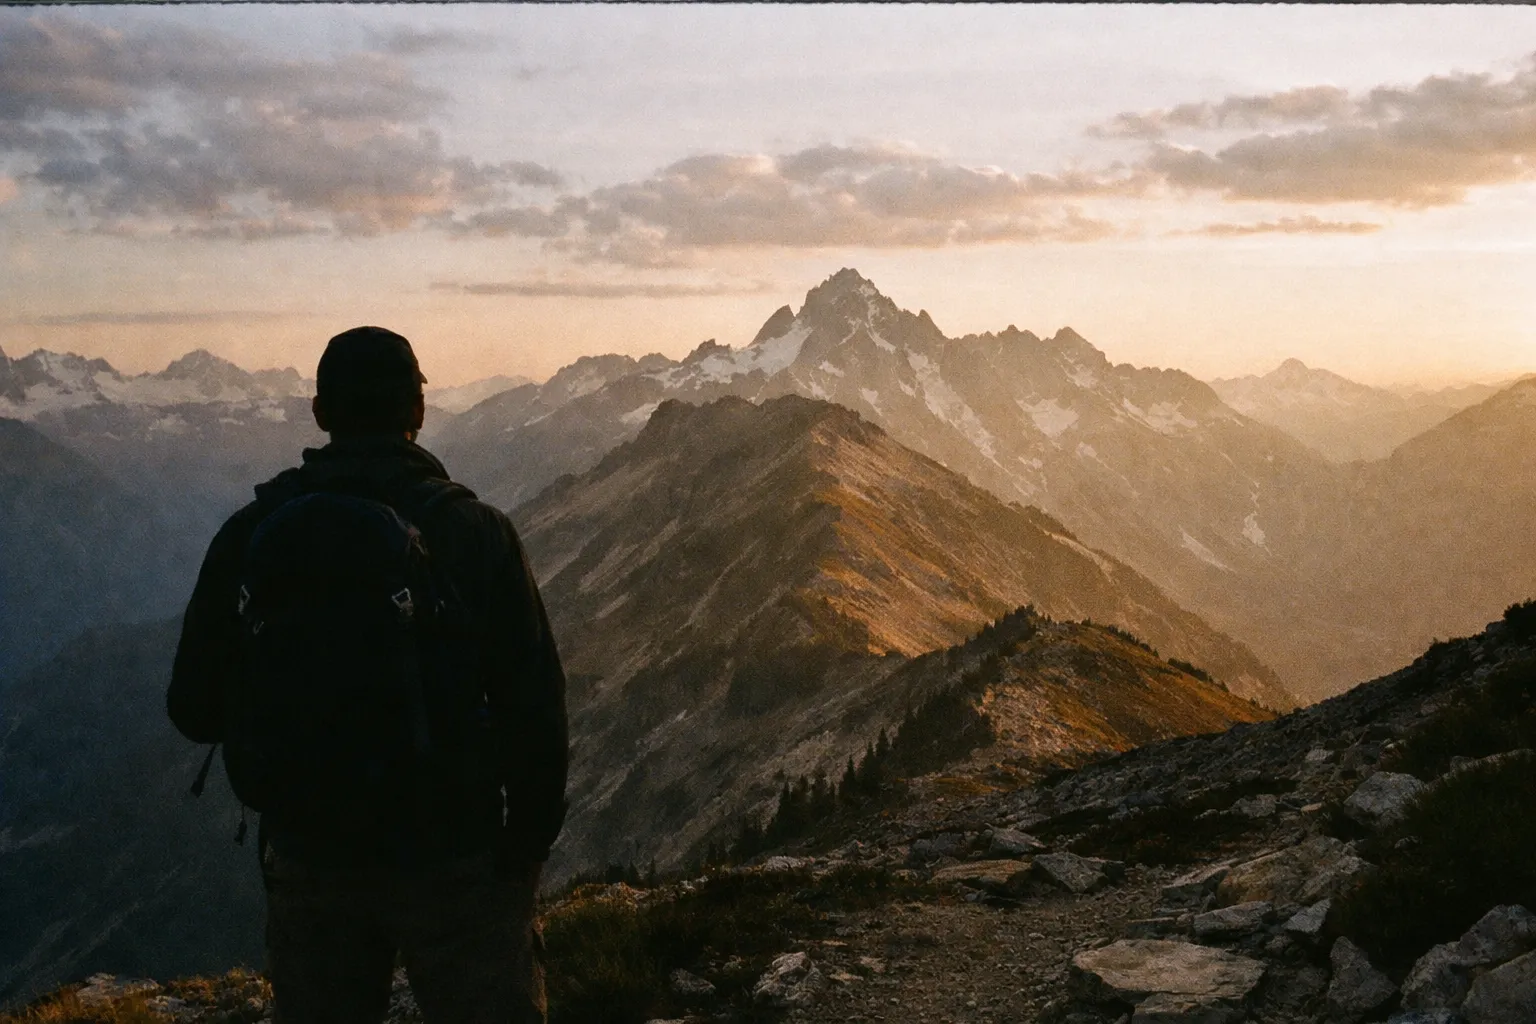
Cascade Pass is a saddle at about 5,400 ft with stone benches placed by the trail crew and a sign marking the junction. Sit down, eat something, drink water. The view south to Johannesburg, Cascade Peak, and the Triplets is the kind of thing that makes the drive worth it on its own.
I watched mountain goats working the slopes across the valley on my way back through. Other hikers reported a black bear sighting on the pass shortly before I arrived - both are common here. Give wildlife space. The goats in this drainage have been habituated enough that they’ll approach hikers for salt; don’t reward that behavior.
Camping at Cascade Pass itself is prohibited. Don’t try it.
North Cascades Cascade Pass Junction: Choosing Your Route
From the pass, the trail splits. Three real options:
1. Turn around here. Cascade Pass alone is a 7.0-mile round trip with about 1,800 ft of gain. Solid moderate day hike, plenty of views, no scrambling.
2. Drop to Doubtful Lake. A signed spur descends north from the pass, losing about 1,000 ft over a mile to reach the lake. The full doubtful lake hike from the trailhead works out to roughly 9-10 miles with about 2,700 ft of cumulative gain (the descent has to be climbed back out).
3. Continue up Sahale Arm. The Arm branches northeast and climbs another 2.2 miles and roughly 2,200 ft to Sahale Glacier Camp (4).
Most people on the trail were continuing up the Arm. I went up partway, then came back and dropped to Doubtful Lake. That gave me the ridge views without committing to the final scramble - a reasonable call if your fitness or timing doesn’t support the full 4,000-ft day.
Sahale Arm: The Upper Trail
The Sahale Arm trail climbs out of Cascade Pass on a steep grass and heather slope, gaining about 1,000 ft in the first mile. The trail is well-defined here. About 0.75 miles up, the ridge crests and you get the classic shot: Doubtful Lake sitting in its basin a thousand feet below, with the Arm sweeping up toward Sahale Mountain.
This is the spot. If you’re carrying a wide-angle lens, this is where to use it.
The grade stays steep but the surface holds together - it’s hiking, not scrambling, through this stretch. Water sources thin out quickly above the pass. Past mid-Arm, there’s no reliable stream until snowfields near the camp itself in late season, so leave Cascade Pass with at least 1.5 L on board.
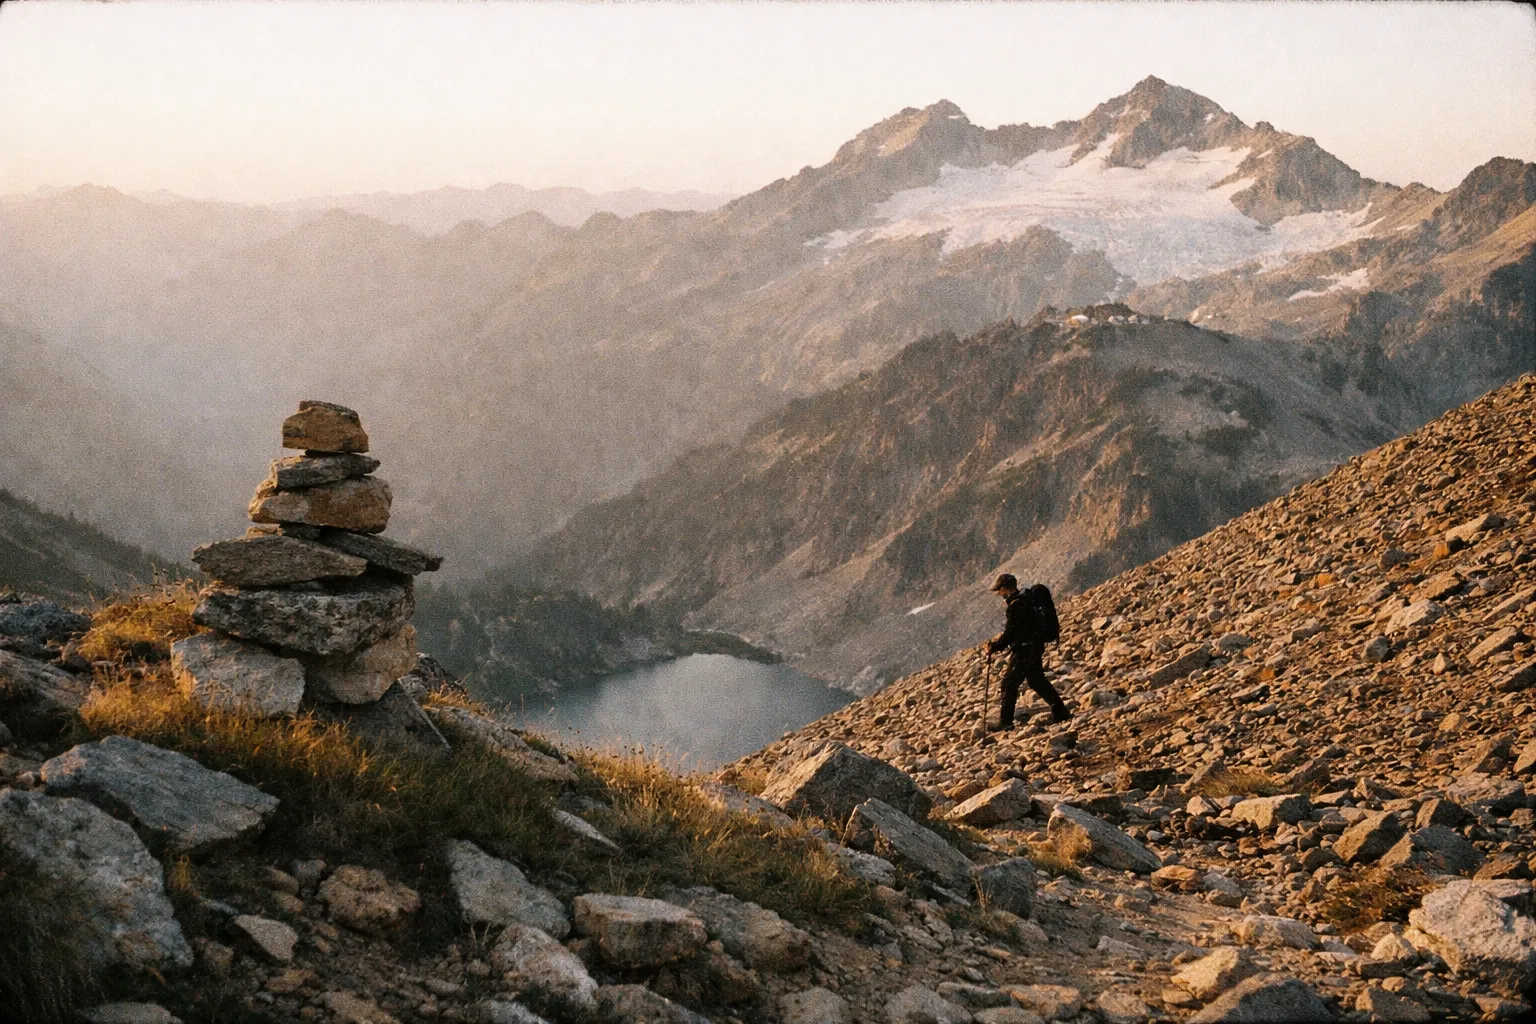
The final 0.6-0.7 mile to Sahale Glacier Camp is different terrain entirely. The trail dissolves into loose scree and rock, gaining over 1,000 ft on cairns and intermittent tread (4). It’s not technical, but it is route-finding on uneven footing with exposure, and in fog it gets disorienting. If you’re not comfortable with that or visibility drops, this is a fine place to turn around.
Sahale Glacier Camp itself sits at about 7,600 ft with views in every direction - Glacier Peak south, Eldorado west, the Pickets north. Camping requires an advance backcountry permit (see permits below).
Safety Note on the Upper Scramble
The upper section above 7,000 ft has loose rock, and parties above you can kick debris down without meaning to. A lightweight climbing helmet - the Petzl Boreo runs about $60 and weighs around 10 oz - is worth carrying if you’re going to Sahale Glacier Camp. This isn’t paranoia. It’s a common enough hazard on this route that guided trips include helmets as standard kit.
In early or late season, snow lingers on north-facing slopes near the pass and on the Arm. Carry microspikes (around $60) and consider an ice axe if you’re hiking before mid-July or after late September.
Doubtful Lake: The Detour Worth Taking
The spur down to Doubtful Lake from Cascade Pass loses about 1,000 ft over a mile of switchbacks. The lake sits in a basin ringed by cliffs, with a waterfall on the far side fed by snowmelt off the upper basin walls.
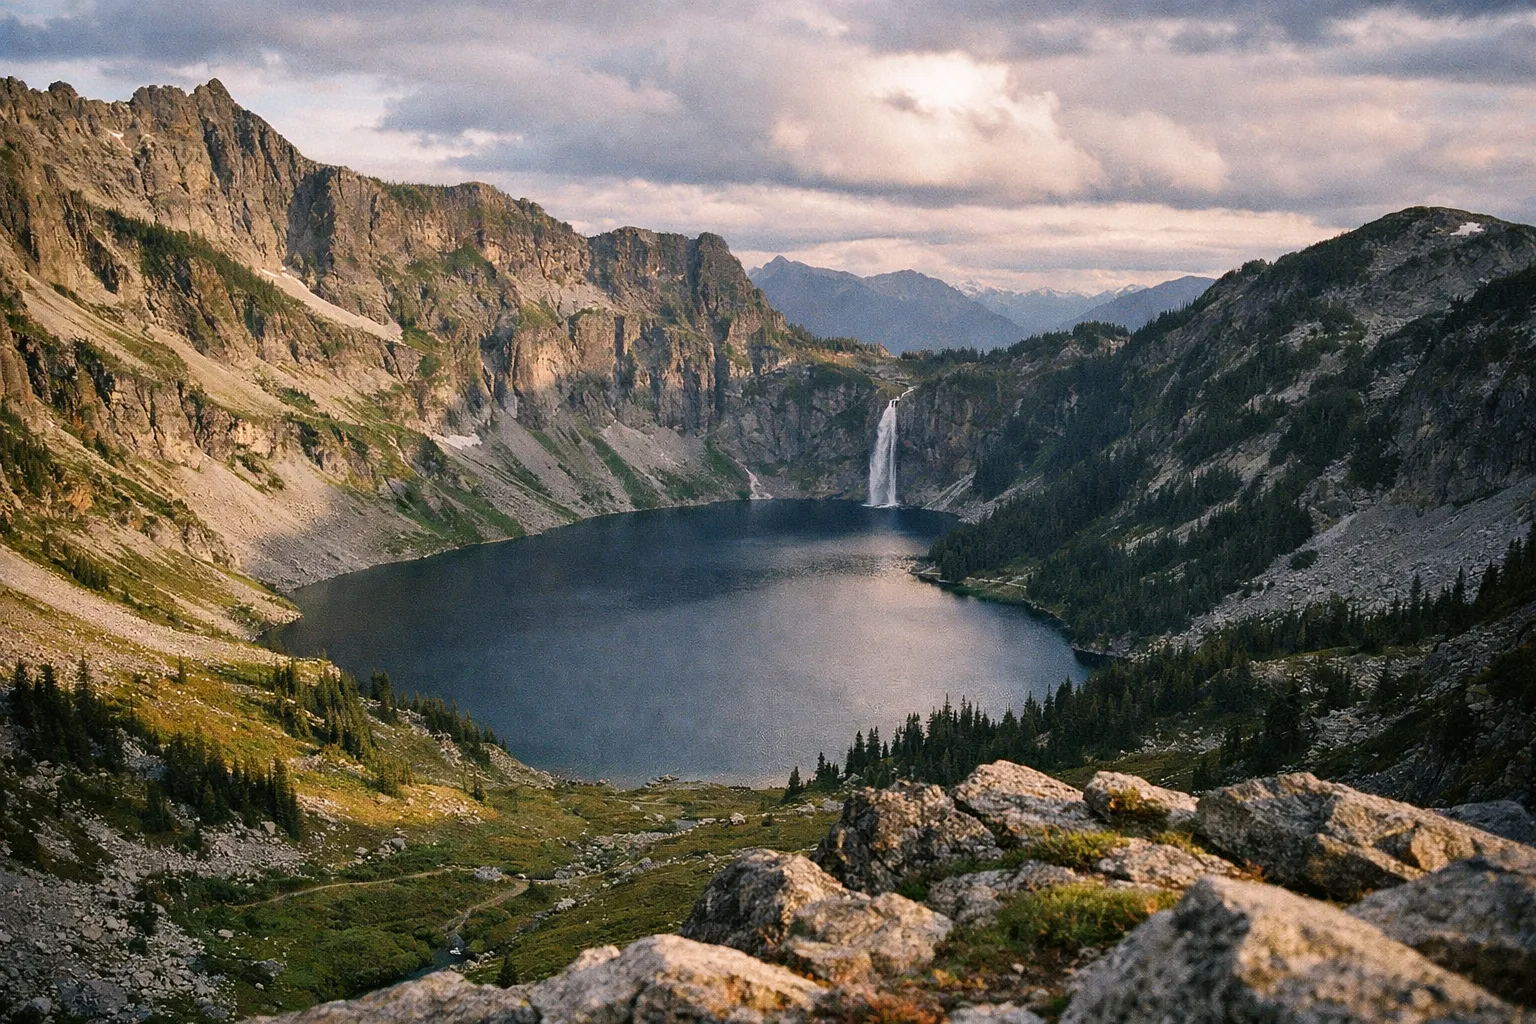
The trail reaches a high overlook first, and you can choose to stop there or continue down to the shoreline. I stayed at the overlook - the angle from above frames the waterfall and the lake together better than the lake-edge view does. If you go all the way to the water, add another mile round trip and a few hundred more feet of climbing on the way out.
Wildlife at the lake: marmots and pikas in the talus, occasional mountain goats on the cliffs. Black bears use this basin for huckleberry foraging in late summer - make noise on the descent.
The climb back up to Cascade Pass is the hard part. It’s only a mile but it’s a steady 1,000-ft pull at the end of your day. Save water and energy for it.
Permits, Fees, and Regulations
Day hiking: No permit required, no fee. North Cascades National Park has no entrance fee - drive in, park, hike.
Overnight at Sahale Glacier Camp: Backcountry permit required, with strict quotas. Permits are released through a mix of advance reservations on Recreation.gov ($6 reservation fee, no per-person fee) and limited walk-up permits from the Marblemount Wilderness Information Center (2). Sahale Glacier Camp quotas fill within minutes of release windows opening for summer dates. Plan 3-6 months ahead.
Other rules:
- No camping at Cascade Pass itself.
- Bear-resistant food storage required. Sahale Glacier Camp has limited or no permanent food storage infrastructure depending on the year - bring a bear canister.
- Pack out all waste, including human waste at Sahale Glacier Camp (blue bags are issued with permits).
- Group size limits apply; check current regulations when reserving.
Before You Go: Pre-Trip Checklist
Run through this within 24 hours of your drive:
- Check NPS “Alerts in Effect” for Cascade River Road closures, snowfield conditions, and bear activity (2).
- Check Washington Trails Association trip reports. WTA’s Cascade Pass and Sahale Arm page hosts hundreds of trip reports - over 650 in recent counts - with date-stamped notes on snow levels, blowdowns, bug pressure, and water sources (1). Reports from the past 7-14 days are the most useful thing you can read before this hike.
- Download offline maps. Gaia GPS or AllTrails+ ($35-$36/year) with the full route and the Doubtful Lake spur. No cell service at the trailhead or anywhere on trail.
- Tell someone your turn-around time. Pick a clock-time, not a location. If you’re not at Sahale Glacier Camp by 2 PM, turn around regardless of how close you feel.
- Check the weather. Use the NOAA mountain forecast for the Cascade Pass area, not the Marblemount valley forecast. They often differ by 15°F and a full weather system.
Pre-Trip Preparation for Cascade Pass & Sahale Arm
30 minutesKey steps to prepare for your hike within 24 hours of departure.
- 1
Check NPS Alerts
Verify Cascade River Road status, snow conditions, and bear activity on the official NPS alerts page.
- 2
Review Recent Trip Reports
Read recent Washington Trails Association reports for current trail conditions, water availability, and bug pressure.
- 3
Download Offline Maps
Get offline maps on Gaia GPS or AllTrails+ covering the full route and Doubtful Lake spur.
- 4
Inform Someone of Your Turn-Around Time
Set a clock time to turn around if not at Sahale Glacier Camp by 2 PM.
- 5
Check Weather Forecast
Use the NOAA mountain forecast for Cascade Pass area, not the valley forecast.
Gear That Actually Earns Its Weight on This Route
What you actually need on this specific trail:
- Hiking footwear. Boots or trail runners with aggressive lugs. For the day hike to Cascade Pass and partway up the Arm, trail runners are fine - I’d go with Altra Lone Peak 7 or Salomon X Ultra. For the scramble to Sahale Glacier Camp, light boots or approach shoes with stiffer soles handle the loose rock better.
- 2.5-3 L water capacity. Reliable refill at the streams in the first 2 miles and a creek crossing just below Cascade Pass. Above the pass, water is unreliable. Sawyer Squeeze ($40) or Katadyn BeFree ($50) for filtering.
- Layers. Temperature swings of 30-40°F between dawn at the trailhead and afternoon on the Arm are normal. Base layer, midlayer, windshell. The ridge above Cascade Pass catches wind from both sides - don’t skip the shell.
- Sun protection. The Arm is fully exposed above tree line for 2+ miles. Sunscreen, UV-rated sunglasses, brimmed hat or trucker.
- Headlamp. Even if you don’t plan to be out after dark, a slow descent or parking-lot situation can put you in twilight.
- Bear spray. Black bears are present. Brown bears are not.
- Trekking poles. Optional going up. Strongly recommended on the descent - the switchbacks and Doubtful Lake spur both punish knees.
- Microspikes (early/late season). For lingering snow on north-facing slopes.
- Helmet (only if going to Sahale Glacier Camp). Petzl Boreo, roughly $60-$70, about 10 oz.
A basic first-aid kit, enough food (plan 200-300 calories per hour of moving time), and a paper map as backup round out the kit.
Best Season and Conditions
Cascade River Road typically opens to the trailhead by late June or early July, depending on the snow year. In heavy winters, the road can stay closed several miles short of the trailhead well into July (2).
Reliable snow-free conditions through Sahale Arm run from roughly early August to late September. Outside that window, expect snowfields on the upper Arm and possibly at Cascade Pass itself.
Month-by-month:
- June: Road often still closed at lower elevations. Snow on the upper trail. Skip unless you have mountaineering experience.
- Early July: Road usually open. Snowfields above Cascade Pass. Bugs are heavy in meadow sections - bring DEET or picaridin.
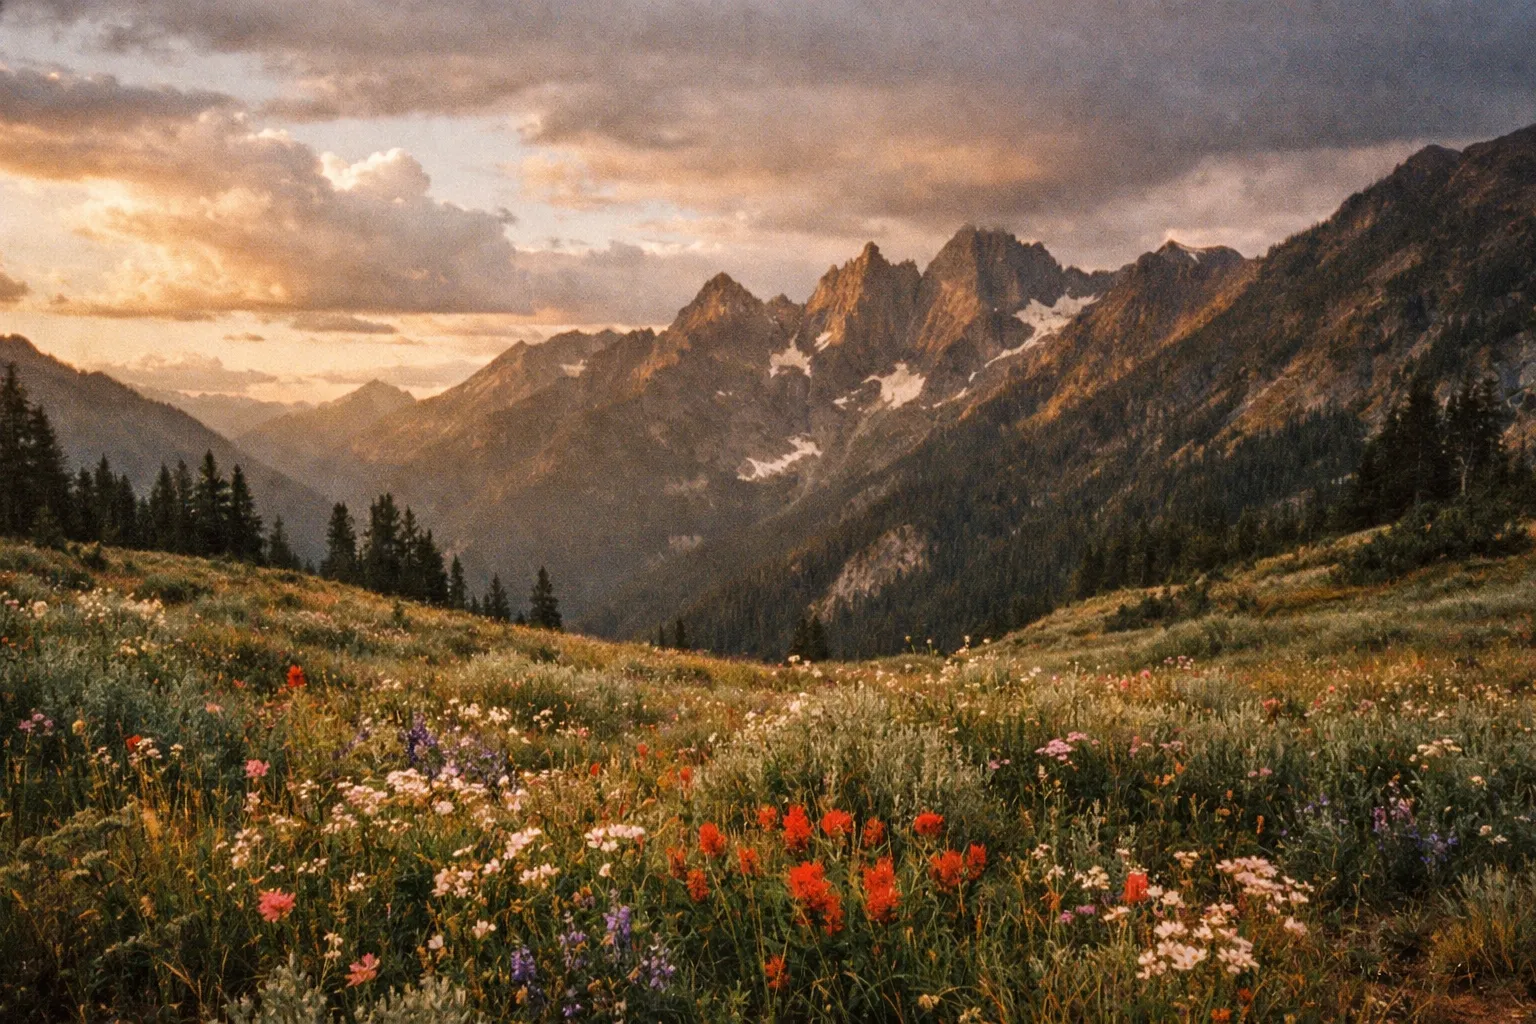
- Late July-August: Peak season. Wildflowers in the meadows, snow mostly gone above the pass. Crowded. Wildfire smoke risk increases through August.
- September: My favorite window. Bugs are gone, crowds thin after Labor Day, fall colors in the heather. Watch for the first snow events.
- October: First major snowfall usually closes the road for the season.
Wildfire smoke has become a real factor in August and September. AQI readings above 100 have occurred regularly in recent summers, killing the views and posing respiratory risk. Check AirNow before driving out.
Time Budget and Pacing
What this hike actually demands of your fitness, broken down by option:
- Cascade Pass only (7.0 mi, ~1,800 ft): 4-6 hours moving. Manageable for someone who comfortably hikes 6+ miles with 1,500 ft gain on local trails.
- Cascade Pass + Doubtful Lake (~10 mi, ~2,700 ft cumulative): 5-7 hours moving. Intermediate fitness; the climb out of the lake basin is the crux.
- Cascade Pass + partial Sahale Arm + Doubtful Lake (what I did, ~10 mi, ~3,000 ft): 6-7 hours. Intermediate-strong.
- Full Sahale Glacier Camp overlook (12 mi, ~4,000 ft): 7-9 hours moving (4, 6). Strong intermediate to advanced. You need to sustain 1,000-1,500 ft per hour for several consecutive hours.
Descent runs significantly faster than ascent - independent trip reports have noted 6 hours up versus 2.5 hours down for the full route (4). Don’t count on a quick descent saving you if you’ve already burned yourself out going up.
If your pace falls below 1 mph on the upper Arm, that’s your signal to turn around. The math gets ugly fast at elevation.
Mistakes I Keep Seeing on This Route
Patterns I’ve seen on this trail and in trip reports:
- Starting too late. A 9 AM start in July puts you back at the lot near sunset for the full route. Earlier is better, full stop.
- Underestimating the elevation. 4,000 ft of gain at altitude eats people who don’t train for sustained climbing.
- Not enough water. Leaving Cascade Pass with 1 L for the upper Arm is a dehydration setup.
- Treating the scramble as a trail. The final pitch to Sahale Glacier Camp is route-finding, not hiking. In fog, people get off-route.
- Camping without a permit. Rangers patrol Sahale Glacier Camp and Cascade Pass. Fines run $150-$200+.
- Ignoring weight on overnights. A 40 lb pack at 1.5 mph means you reach Sahale Glacier near dark on a 1-night trip. Cut grams.
Frequently Asked Questions
- What are the risks of hiking Sahale Arm in fog or bad weather?
- The upper scramble section becomes disorienting and route-finding is tricky. Loose rock increases hazard of falling debris. Turning around early is safest.
- How reliable are water sources above Cascade Pass?
- Water is scarce above the pass until snowfields near Sahale Glacier Camp late in the season. Carry at least 1.5 liters from the pass.
- Can I park overnight at the trailhead?
- The parking lot fills early on busy days and overnight parking rules vary. Check local signage and consider lodging in Marblemount or Rockport.
- Is the scramble to Sahale Glacier Camp suitable for children or inexperienced hikers?
- No. The final 0.6-0.7 miles involve loose scree, exposure, and route-finding. Only strong, experienced hikers should attempt it.
- What should I do if I encounter wildlife on the trail?
- Give animals space and do not feed them. Make noise on descents near bear foraging areas. Carry bear spray and know how to use it.
- Are there guided trips available for this hike?
- Yes, outfitters like Wildland Trekking offer multi-day guided hikes including Sahale Arm, which can help with logistics and safety.
After the Hike
The descent through the switchbacks is hard on the quads - that’s where trekking poles earn their keep. On the way back to Marblemount, Birdsview Brewing Company in Birdsview is a solid stop for a post-hike beer if you’re heading west on SR-20. Marblemount itself has a couple of basic food options.
The cascade pass sahale arm trail ranks among the strongest alpine day hikes in Washington for views per mile. The option to bail at the pass or detour to Doubtful Lake means you can scale the trip to your fitness without giving up the payoff. Check the road status, get there early, and don’t be too proud to turn around if the upper scramble doesn’t feel right.